

Table of Contents
- What You'll Need Before You Build Your Panning Station
- Step 1: Pick a Location and Build Your Water Supply
- Step 2: Assemble Your Gold Panning Equipment for Beginners
- Step 3: Set the Gold Sluice Box Angle and Run Your First Material
- Step 4: Work the Material From Dig to Final Pan
- Common Gold Panning Mistakes to Avoid at Your Station
- Safety, Permissions, and Keeping Your Station Running
- Conclusion: Your Panning Station Is Ready to Test
- Frequently Asked Questions
Last Updated: October 6, 2026
What You'll Need Before You Build Your Panning Station
A panning station is a fixed or portable setup combining a water source, classifying screens, and a sluice or pan so you can process material without crouching in a creek all day.
Here's what most guides miss: a gold panning station setup is really a water-handling problem.
This guide covers a complete DIY build, from location to final pan, plus the water management, safety, and troubleshooting details equipment catalogs skip.
Total build time: 2-4 hours Difficulty: Beginner Budget tiers: Low (bucket-and-tub), Mid (recirculating tub with pump), High (dedicated sluice stand)
Step 1: Pick a Location and Build Your Water Supply
Choosing a streamside or backyard setup is the first real decision.
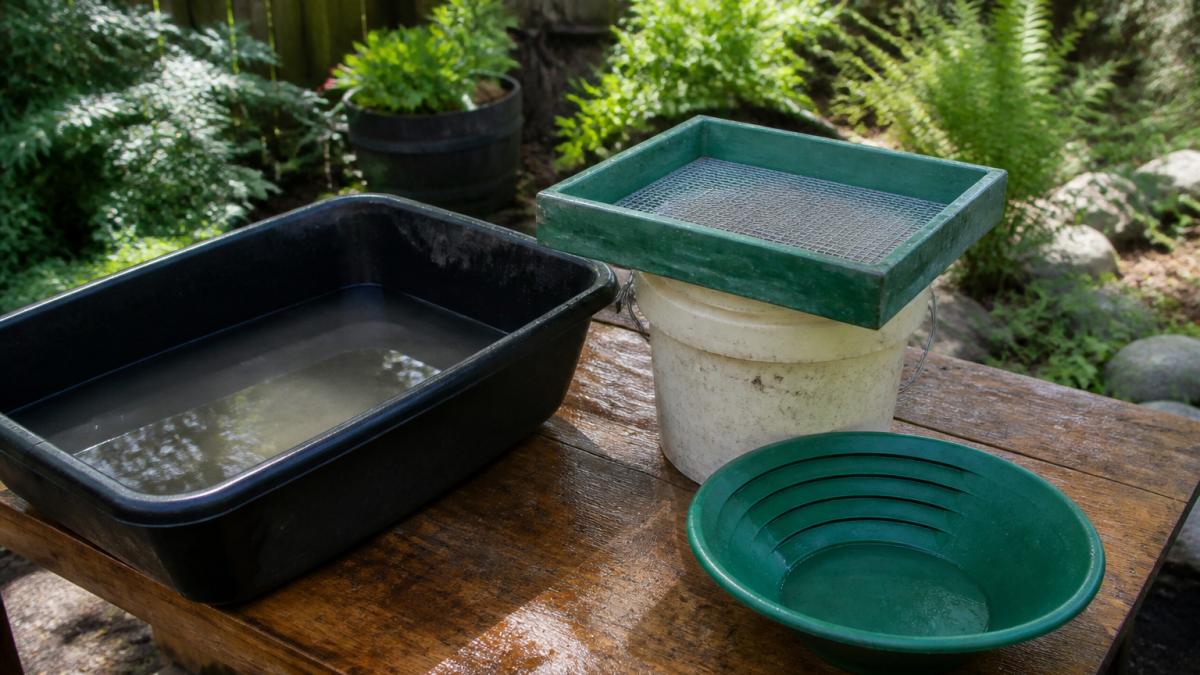
For a streamside build, pick a spot near shallow water with a flat bank and room to set a bucket, classifier, and sluice without standing in the current.
For a backyard build, you need three things: a large tub or water trough, a submersible pump or a recirculating sluice, and a way to settle sediment so you're not pumping mud.
Recirculating Water for a Backyard Station
A recirculating water system is a closed loop: water flows through the sluice, drops into a settling tub, and gets pumped back to the top. The key is a two-stage tub setup.
- Stage one: a catch tub under the sluice outlet where heavy material settles
- Stage two: a clean reservoir the pump draws from
- Add a coarse screen or filter bag between them so sediment doesn't clog the pump
Step 2: Assemble Your Gold Panning Equipment for Beginners
The best gold panning equipment for beginners is a short, cheap list. You don't need a suction dredge or dry washer, just classification, containment, and a way to move material, sized to work together.
Start with one quality gold pan with deep riffles, then add a classifier, two buckets, a shovel, and a scoop. Everything else is optional until you know your ground.
Bill of Materials for a Complete Station
This is the full parts list for a bucket-and-tub station. Sizes are the ones that fit together without fighting each other.
| Item | Typical Size | Purpose | Notes |
|---|---|---|---|
| Gold pan | 12-14 in. diameter, deep riffles | Final concentration and cleanup | A 14 in. pan holds more but is heavier to work |
| Classifier | 1/4 in. and 1/2 in. mesh, fits a 5-gallon bucket rim | Grades feed by size | Two sizes let you split coarse and fine separately |
| Feed bucket | 5-gallon | Holds classified material | Mark it so it never becomes a tailings bucket |
| Tailings bucket | 5-gallon | Holds processed material | Keep it physically separate from feed |
| Shovel | Short-handled, square point | Moves volume from bank or pile | A short handle is easier to control in a tub |
| Scoop | Plastic or metal, narrow | Cleans cracks and crevices | Reaches where a shovel cannot |
| Water tub | 20-30 gallon, rigid sides | Holds recirculated water | Rigid walls keep the sluice from shifting |
| Settling tub | 10-15 gallon | Catches sediment before the pump | Sized smaller than the main tub |
| Submersible pump | Low-flow, adjustable | Returns water to the sluice | Match flow to sluice width, not to maximum output |
| Sluice box | 24-36 in. long, 6-10 in. wide | Optional gravity separation | A shorter sluice is easier to level in a tub |
Classifiers, Buckets, and Shovels That Earn Their Space
A classifier is a screen that grades feed material before it hits the pan or sluice. Running classified material roughly doubles your effective throughput because you're not fighting rocks.
Buckets do more than carry dirt.
Shovels and scoops serve different jobs. A shovel moves volume; a scoop gets into bedrock cracks and crevices where gold flakes collect. If you're working a stream, bring both.
Low-Cost Versus Durable Build Options
A low-cost station is a plastic tub, a bucket, a classifier, and a pan, assemble it from a hardware store in one trip. It works, and it's the right starting point if you're still learning your ground.
A durable station upgrades the parts that wear: a rigid tub, a metal classifier, and a sluice with replaceable riffle matting. The trade-off is weight and cost, not recovery.
Step 3: Set the Gold Sluice Box Angle and Run Your First Material
Gold sluice box angle decides whether your station recovers gold or washes it away. Too steep and material races through; too flat and the sluice clogs with gravel.
Start around 10 to 15 degrees for a recirculating setup. The right angle is where material moves steadily, riffles stay active, and you see a visible boil behind each riffle.
Feed material in small, steady scoops. Dumping a full shovel at once buries the riffles and defeats the whole design.
Step 4: Work the Material From Dig to Final Pan
A panning station setup only pays off if the workflow is repeatable. This is the sequence that turns a pile of dirt into a clean concentrate.
The Dig-to-Pan Sequence
- Sample before you dig. Take a pan or two from the top layer of a gravel bar or the inside bend of a stream and pan it down. If there is no color in the sample, move before you move volume.
- Dig from the right layer. Gold is heavy, so it works its way down to bedrock, clay, or a hardpan layer. Dig down to that contact, not just the surface gravel.
- Load the feed bucket. Keep the load to what you can process in one session. A full 5-gallon bucket of classified material is a realistic afternoon.
- Classify over the feed bucket. Shake the material through the 1/2 in. screen, then the 1/4 in. screen. Set the oversized rocks aside and inspect them, gold can ride on clay or in cracks.
- Run the classified feed. Feed the sluice in small, steady scoops, or pan it directly if you are running a pan-only station.
- Clean up the concentrate. Pan the sluice concentrate down in stages until you have a small tail of black sand and, hopefully, gold.
Final Panning Technique
Work the material down in stages. First, wash away lighter material with a gentle swirl, letting water carry off sand and leave the heavies. Then classify again if the concentrate is still mixed.
Don't rush the last stage. Fine gold moves with the water, so keep the water moving and the pan steady, the finest flakes are often lost in the final rinse because the pan is tilted too far.
Test Your Station With a Known Sample
You can't trust a station you've never tested. The cheapest diagnostic is a known sample: add a few flakes of gold to a bucket of clean, classified material, run it through the station, and pan the tailings. Flakes in your pan mean it's working; flakes in the tailings mean something in the chain is losing them.
Run the test at the start of a session and again if you change the sluice angle or flow. It takes ten minutes and tells you more than a week of guessing.
Troubleshooting Lost Fine Gold
When gold goes missing, work backward through the station:
- Gold in the tailings bucket: the sluice angle is too steep, the flow is too high, or the feed rate is too fast. Lower the angle, reduce the flow, and feed smaller scoops.
- Gold in the sluice but not the pan: the cleanup panning is too aggressive. Slow the final swirl and keep the pan flatter.
- No gold anywhere: the sample was barren, or you dug the wrong layer. Re-sample before you change the equipment.
- Gold stuck in the classifier: the material was too wet and clumped. Dry or pre-wash the feed before classifying.
Common Gold Panning Mistakes to Avoid at Your Station
The most frequent gold panning mistakes are structural, not personal, station design choices that quietly bleed fine gold out of the system.
- Feeding too fast, which buries riffles and stops separation
- Running water too high, which flushes heavy minerals out the back
- Reusing tailings as feed, which wastes time on already-processed material
- Panning in deep, fast water where you can't see the pan bottom
- Ignoring classification, which overloads the pan and sluice
- Never testing recovery, so problems go unnoticed for weeks
The fix for most of these is a slower, more deliberate workflow. A station that processes less material per hour but recovers more of the gold in it always wins.
Safety, Permissions, and Keeping Your Station Running
Before you dig, confirm you're allowed to. Rules for mining activity, water use, and digging on public land vary by state and landowner, and they're enforced.
For a backyard station, safety is mostly about water and electricity. Keep pumps and cords away from standing water, use a ground-fault circuit interrupter outlet outdoors, and never leave a recirculating system unattended.
Maintenance is simple: rinse your classifier and pan after each session, clear sediment from the pump intake, and store screens dry so they don't corrode.
Conclusion: Your Panning Station Is Ready to Test
Building a panning station is a weekend project that changes how you prospect for years. Get the water supply right, classify your material, dial in the sluice angle, and test recovery before you trust the setup.
If you'd rather hold verified gold than chase it, Parker's Gold offers raw placer gold flakes sourced directly from Parker Schnabel's Dominion Creek operation, each package presented in a handcrafted tri-fold display case with an official Certificate of Authenticity.
Claim yours and own a verified piece of Yukon gold rush history.
Frequently Asked Questions
How much water do you need for a gold panning station?
A backyard panning station needs at least 10 to 15 gallons in a tub or trough to keep material submerged while you classify and pan. If you run a sluice, plan on 5 to 10 gallons per minute of flow, which usually means a small recirculating pump and a second catch tub. Streamside setups pull directly from shallow water, but you still want a bucket or two on hand for pre-soaking dirt and gravel before you pan it.
What is the correct angle for a gold sluice box?
Most sluice boxes run best between 5 and 15 degrees of downward tilt, and the right number depends on your water speed and how much clay is in the material. Start shallow, around 5 to 8 degrees, and watch how the material moves. If fine gold is washing out the end, reduce the angle or slow the water. If gravel piles up and stops moving, increase the angle slightly. Test with a few handfuls of classified material before you run a full bucket.
What are common gold panning mistakes beginners make?
The biggest mistakes are panning unclassified material, using too much water speed, and dumping the pan too early when a few dark grains are all that's left. Classify your dirt and gravel through a screen first so you're only panning similar-sized material. Keep the pan mostly submerged and use a gentle circular motion to let lighter material wash off. When you're down to black sand and a small amount of concentrate, slow down and finish in the tub instead of the stream.
How do you keep fine gold from washing out of a pan?
Fine gold flakes sit at the bottom of the pan under heavier black sand, so the goal is to move water across the surface without lifting the concentrate. Keep the pan tilted slightly away from you, use slow circular motions, and let water wash only the top layer. Finish the last bit of material in a tub or bucket of still water, and check the tub after each session. Any flakes that escape the pan settle in the tub, and you can recover them later.